We’ve all been there, right? You write up a document in Microsoft Word and want to run it by someone else to see what they think. You email your file, and a little while later you get a file back with a curt response, “Looks good, but I made a few changes.”
Well, now you have a problem.
You have a new file and your old file, how do you tell what changes were made? Even worse, what if this is more collaborative than just a quick look at one document? What if you will be passing this document back and forth and, at one point, what if you get that email that says, “You know what? I like that version you sent three emails ago. You should go with that one.”
You’re going to spend hours reconciling changes and searching through emails trying to merge different versions of the document.
Unless…
You follow these two simples steps when you collaborate in Microsoft Word.
- Use unique, systematic file names
- Use Microsoft Word’s built-in compare tool
Unique, systematic file names
This is so simple and powerful, you’ll wonder why you’ve never thought of it before. When you’re ready to start exchanging files all you need to do is add a systematic suffix to the end. This suffix should include the date, a version indicator and your initials. (Pro tip: Always use the year first when you name files so that they will be grouped together by year when you list alphabetically)
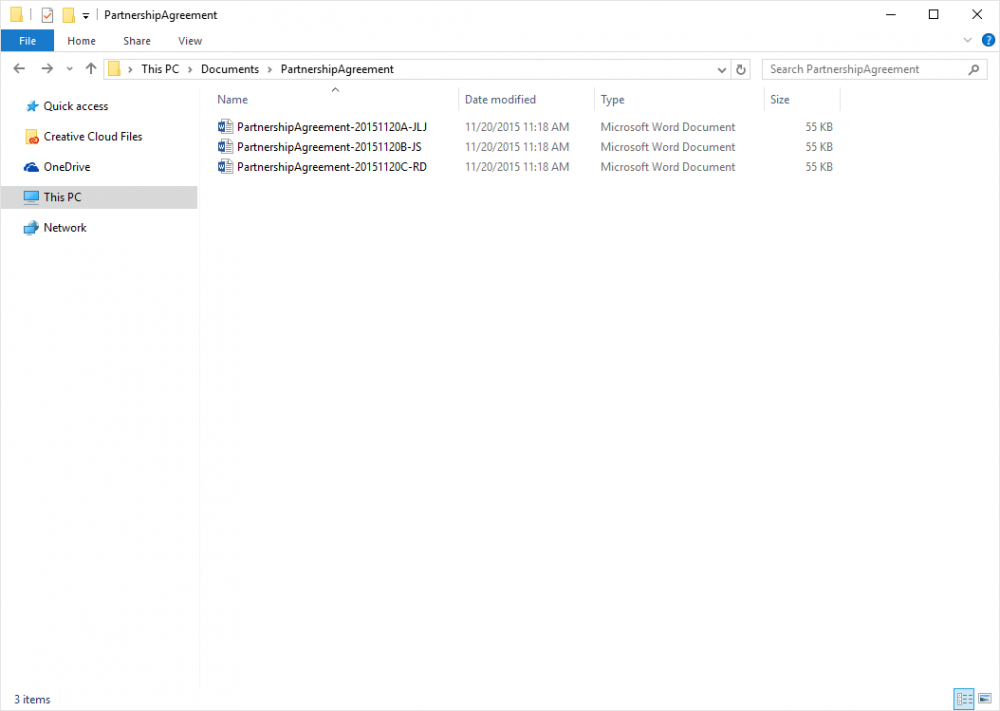
So let’s say I have a PartnershipAgreement.docx file that I need to send around to get approval and feedback. Before I email it out, I’ll make a copy and rename it:
PartnershipAgreement-20151120A-JLJ.docx.
Let’s break that down:
- PartnershipAgreement is the base filename
- 2015 is the year
- 11 is the month
- 20 is the day
- A is the version of today’s file. With the next file I’d use B, and then C and so on. Starting tomorrow, I’d go back to A.
- JLJ are my initials.
Now when I send this off to Jane Smith and Rob Doe, I’ll save all of those in the same folder as my PartnershipAgreement-20151120A-JLJ.docx document. Jane’s will be PartnershipAgreement-20151120B-JS.docx and Rob’s will be PartnershipAgreement-20151120C-RD.docx. This gives me a folder where all of the documents are stored, along with some breadcrumbs that will help me travel back and forth to track changes.
“That’s great,” you may be asking, “But how in the world do I sort through all those documents and reconcile changes that my colleagues have made?”
I’m glad you asked…
Microsoft Word’s built-in compare tool
Microsoft Word has a great, built-in comparison tool and it’s extremely easy to us.
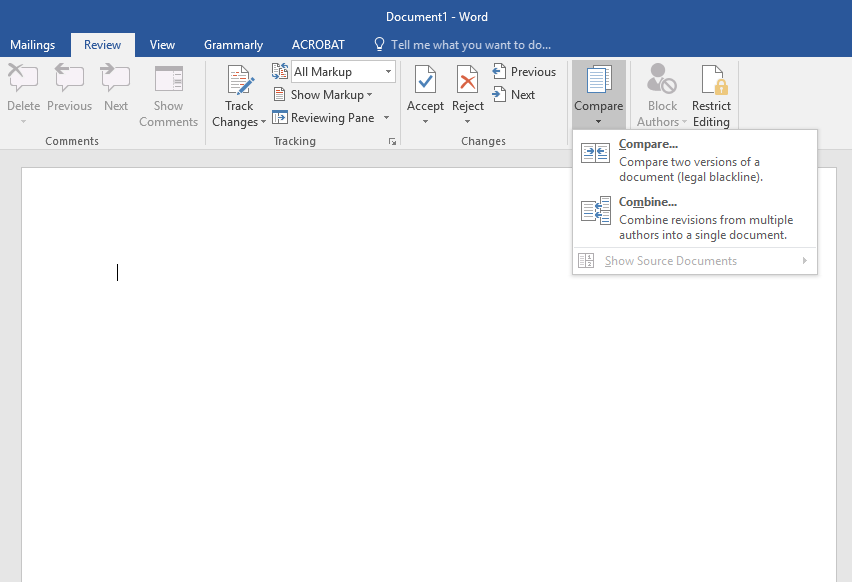
Start with a blank document. Select the Review tab -> Compare -> Combine
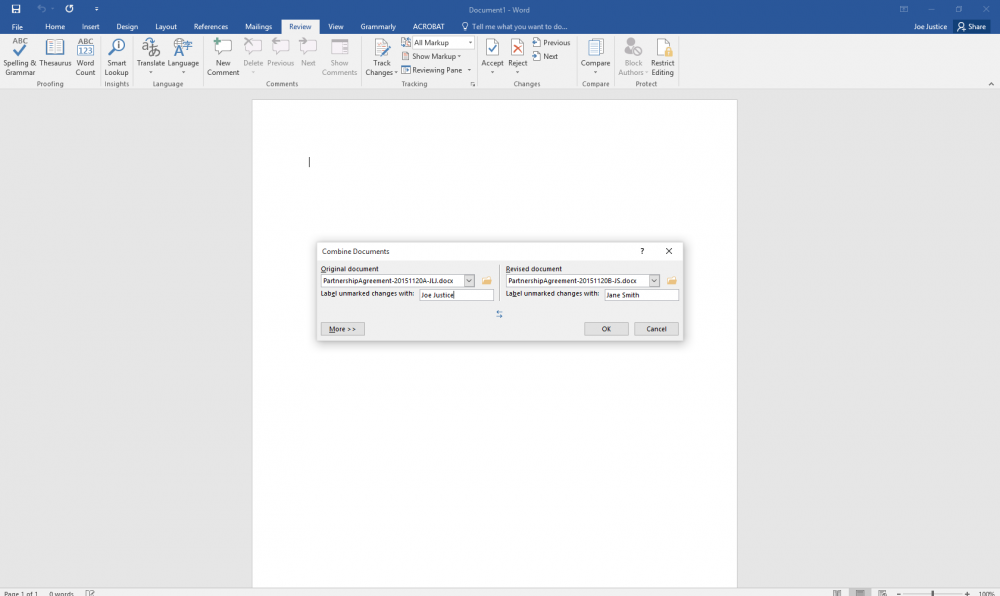
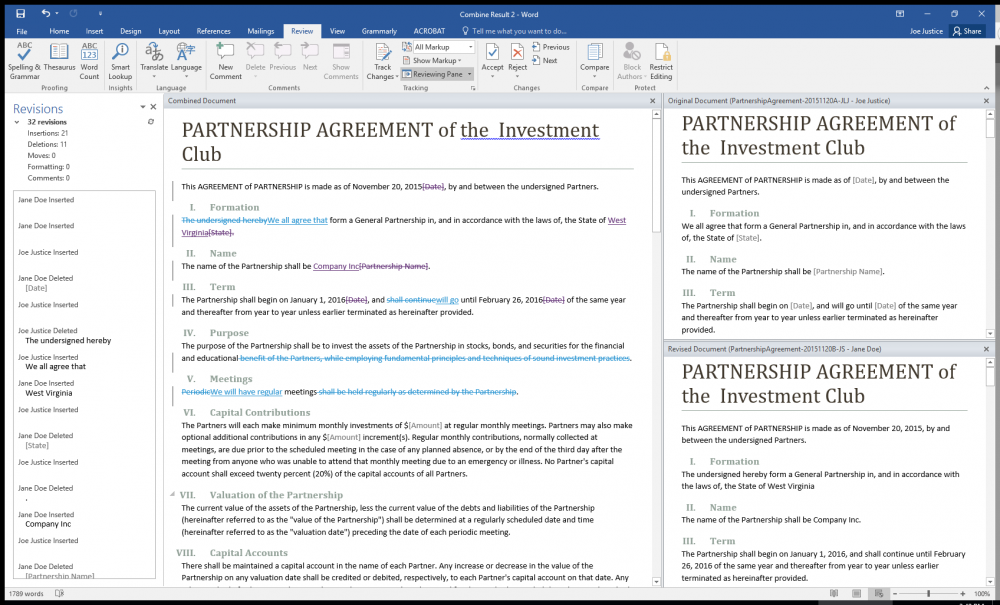
You’ll get a dialog that lets you choose an original document and a revised document. Select your latest document as the original and your colleague’s latest as the revised. Click OK and Microsoft Word will transform into a multi-pane display that shows all the revisions, the combined document, the original document and the revised document.
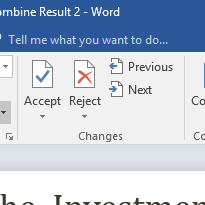
The changes will appear in different colors with a strikethrough over words that have been deleted. Under the Review tab, there is a Changes section that allows you to move back and forth between revisions and either accept them or reject them.
You can also directly edit the combined document, and the Original and Revised views will track with your cursor.
When you’re all done, click Save to save the combined document, and you’re ready to send it to the next person on your list.

Authored by Joe Justice, Marketing Director for Advantage Technology I hope you enjoyed this blog, please help us spread it by using the sharing tools at the top of the page. When solving your tech challenges, from day-to-day technical support to large scale hardware installation, always call us at Advantage Technology, 304-973-9537. |


